 Save
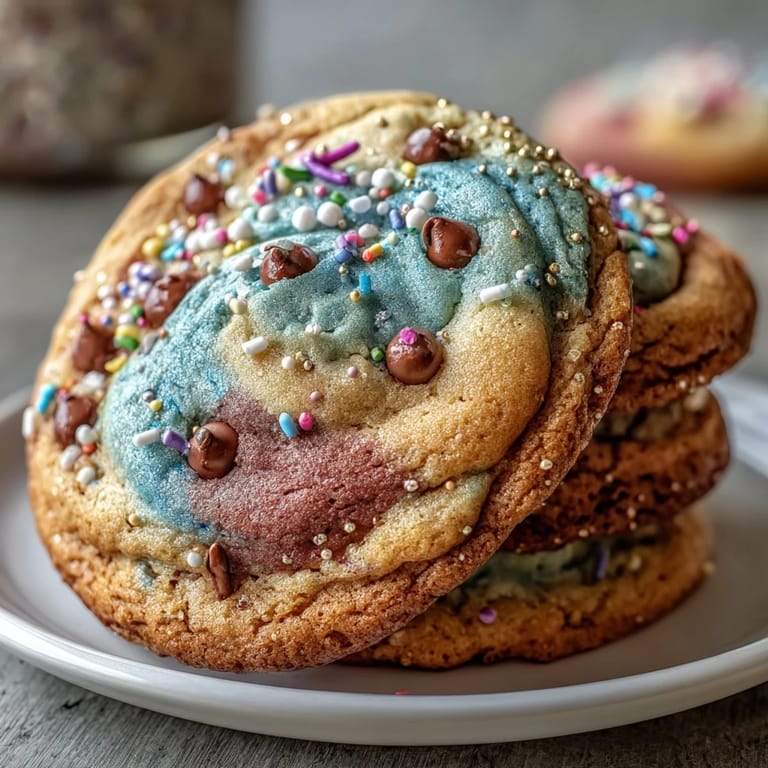
Save My nephew burst through the kitchen door asking if I could make cookies that looked like they belonged in a video game, and somehow I ended up scrolling through Cookie Run Kingdom screenshots at midnight, mesmerized by those impossibly perfect pastel swirls. The moment I twisted together those first ropes of colored dough, I understood the appeal—it felt like edible art, and the fact that they'd actually taste buttery and soft made the whole thing feel like cheating at baking. These pastel swirl cookies became my answer to making ordinary birthdays feel a little more magical.
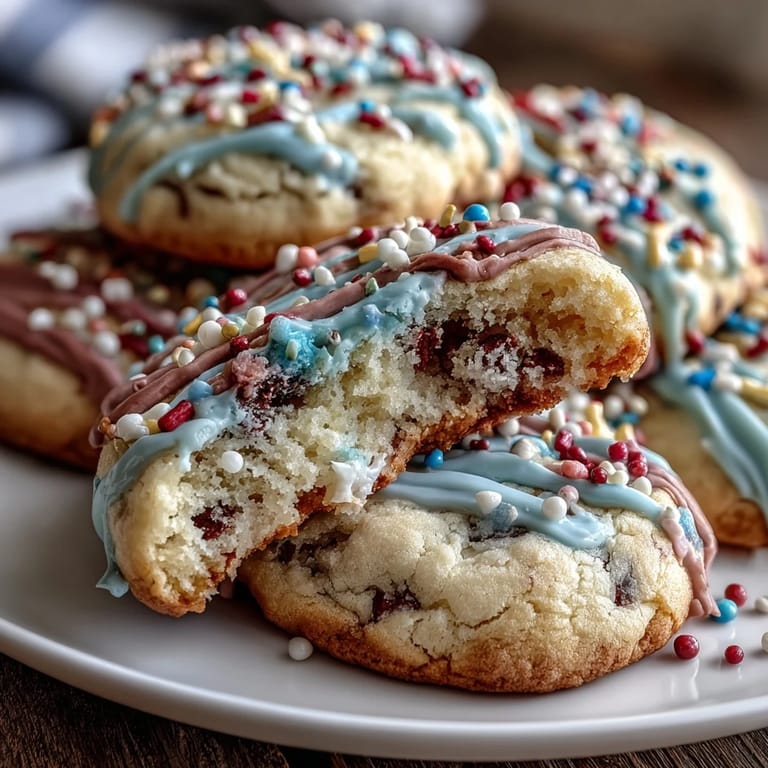
I still think about my sister's face when she opened the cookie tin at her surprise party—she actually gasped, which doesn't happen often. The cookies were already delicious, but watching people hesitate before taking a bite because they were almost too pretty to eat made the whole two-hour chill time feel worthwhile. That's when I realized these aren't just cookies; they're the kind of thing that makes someone feel genuinely celebrated.
Ingredients
- All-purpose flour (2 1/2 cups): The foundation that keeps these cookies tender rather than cakey—don't skip the sifting step if you're measuring by volume, as packed flour changes everything.
- Unsalted butter (1 cup, room temperature): Room temperature butter creams properly and distributes evenly, which is non-negotiable for that melt-in-your-mouth texture.
- Granulated sugar (1 cup): This creates the right structure and slight crispness at the edges while keeping the center soft.
- Large egg: Binds everything together without making the cookies dense or cakey.
- Pure vanilla extract (2 tsp): Use real vanilla, not imitation—the difference shows in cookies this simple.
- Almond extract (1/2 tsp, optional): A tiny amount adds a subtle sophistication that catches people off guard in the best way.
- Baking powder (1/2 tsp): Just enough to encourage gentle rise without creating a fluffy cake texture.
- Salt (1/4 tsp): Never skip this—it balances sweetness and enhances flavor complexity.
- Gel food coloring (pastel shades): Gel coloring keeps your dough from getting wet and changing texture like liquid coloring does.
- Pastel sprinkles (1/4 cup): The finishing touch that celebrates the whole whimsical vibe.
Tired of Takeout? 🥡
Get 10 meals you can make faster than delivery arrives. Seriously.
One email. No spam. Unsubscribe anytime.
Instructions
- Mix Your Dry Foundation:
- Whisk together flour, baking powder, and salt in a medium bowl, making sure the baking powder gets distributed evenly throughout so you don't end up with random fluffy spots in some cookies.
- Cream Butter and Sugar:
- Beat softened butter with sugar for a solid 2-3 minutes until the mixture is pale, fluffy, and noticeably lighter—this incorporates air that keeps cookies tender. Stop when it looks almost like fluffy clouds.
- Bring in Wet Ingredients:
- Add your egg and both extracts, mixing until the dough looks smooth and unified, which takes less time than you think.
- Combine Wet and Dry:
- Fold the dry mixture into the wet ingredients gently, stopping as soon as streaks of flour disappear—overmixing develops gluten and toughens your cookies. This is the moment to resist the urge to keep mixing.
- Divide and Color Your Dough:
- Split dough into 3 or 4 portions (depending on how many colors you want), then knead each portion with gel coloring until the color is evenly distributed and vibrant. Your hands will get stained, but it washes off.
- Roll Colored Ropes:
- Roll each colored dough into a rope about 12 inches long and roughly the thickness of your thumb—consistency doesn't need to be perfect, as slight variations actually add charm.
- Create the Swirl:
- Gently twist all your ropes together (loosely is better than tightly wound), then roll the twisted mass into a compact log and wrap it in plastic wrap. If it gets too long and unwieldy, you can slice it in half.
- Chill Your Patience:
- Let the dough sit in the fridge for at least 2 hours—I usually do this overnight because it also gives me time to prepare my workspace and mentally prepare for the slicing. The firmer dough slices cleanly and holds its shape in the oven.
- Preheat and Prepare:
- Heat your oven to 350°F and line baking sheets with parchment paper, which prevents sticking and ensures even browning on the bottoms.
- Slice with Confidence:
- Using a sharp knife (which matters more than you'd think), slice the chilled log into 1/4-inch rounds and place them about 2 inches apart on your prepared sheets. Wipe your knife between slices if the dough starts sticking.
- Add Final Sparkle:
- Top each slice with a few pastel sprinkles if you're going for maximum festive impact.
- Bake to Perfection:
- Bake for 10-12 minutes until the edges just barely start turning golden—the centers should look almost underbaked because these cookies continue cooking slightly as they cool. Pull them out when you think they might need 30 more seconds.
- Cool Like You Mean It:
- Let cookies rest on the baking sheet for 5 minutes (this is crucial—they firm up enough to move without breaking), then transfer to a wire rack to cool completely.
 Save
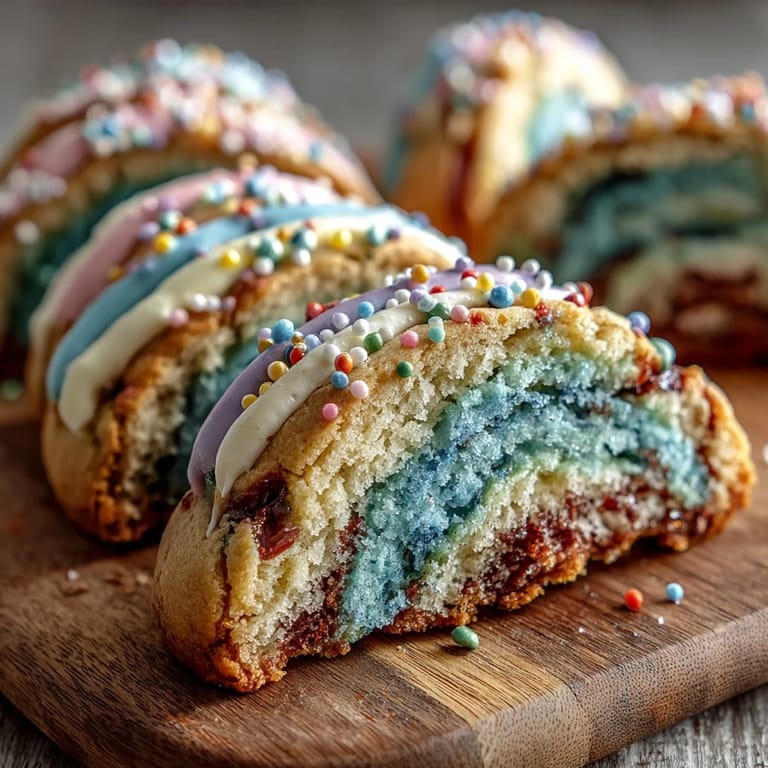
Save There's something quietly joyful about slicing into that chilled log for the first time and seeing all those colors swirled together inside, knowing exactly what kind of smile it'll get from someone. That moment before they bite in—when they're admiring the cookie like it's too pretty to eat—that's what makes the whole process worth it.
The Magic of Gel Coloring
When I first made these cookies, I grabbed liquid food coloring from my baking cabinet without thinking, and the dough turned into an oily mess that spread across the baking sheet like it had given up on life. Switching to gel coloring was a revelation—it colors the dough beautifully without adding moisture, and the difference is immediately obvious when you're kneading it in your hands. The texture stays smooth and pliable instead of becoming greasy, which means your swirls stay defined instead of blurring together during baking.
Understanding the Chill Time
The two-hour (or overnight) chill time feels like a test of patience, but it's actually working hard for you—the dough becomes firm enough to slice into clean rounds instead of crumbling or smearing, and the flavors have time to meld together and intensify. I learned this the hard way by trying to bake partially chilled dough that spread into weird shapes and looked nothing like the neat rounds I was imagining. Now I actually appreciate the chill time as built-in decoration time or an excuse to prep other things, and my cookies always come out looking exactly how I planned.
Storage and Make-Ahead Magic
These cookies are genuinely make-ahead friendly, which transforms them from a last-minute panic into something you can confidently prepare days in advance. You can refrigerate the dough log for up to a week before slicing, or bake the cookies and store them in an airtight container for five days (though they rarely last that long in my house). I've also frozen the unbaked dough log for up to two months, which means you could theoretically bake fresh cookies for any occasion without starting from scratch.
- Keep the dough log wrapped tightly in plastic wrap to prevent it from drying out or absorbing fridge smells.
- Store baked cookies in a container with parchment paper between layers so they don't stick together.
- If cookies start feeling stale, a few seconds in the microwave returns them to soft and chewy.
 Save
Save These cookies exist at the perfect intersection of impressive-looking and genuinely simple to make, which is exactly why they've become my go-to when someone deserves something special. The pastel swirls feel fancy, but the actual work is forgiving and even meditative in a way that regular baking sometimes isn't.
Recipe FAQs
- → How do I achieve vibrant pastel colors in the dough?
Use gel food coloring for bright, vibrant pastel hues without altering the dough's consistency.
- → What is the purpose of chilling the dough before baking?
Chilling firms the dough, making it easier to slice and helps maintain the swirl pattern during baking.
- → Can I add extra flavors to these cookies?
Yes, adding lemon or orange zest to the dough enhances the flavor with a fresh citrus note.
- → How should I store these cookies to keep them fresh?
Store in an airtight container at room temperature for up to five days to keep them soft.
- → What is the best way to twist colored dough for a marbled effect?
Twist dough ropes loosely and avoid overmixing to maintain distinct pastel swirls and a marbled look.