 Save
Save My grandmother kept a designated container in her freezer, perpetually filling with carrot peels and onion ends. I thought it was peculiar until I spent a winter afternoon learning how those seemingly worthless scraps transform into liquid gold. Now my own freezer is never without a growing collection of vegetable trimmings, waiting for their moment to shine. There is something deeply satisfying about turning what most people toss into something so essential and nourishing.
Last winter, when my entire household came down with a nasty cold, this broth became our medicine. I simmered a massive batch while snow fell outside the kitchen window, filling the entire house with the most comforting aroma imaginable. Everyone who sipped it swore it had healing powers. Whether it was the broth or just the warmth, we all recovered faster than expected.
Ingredients
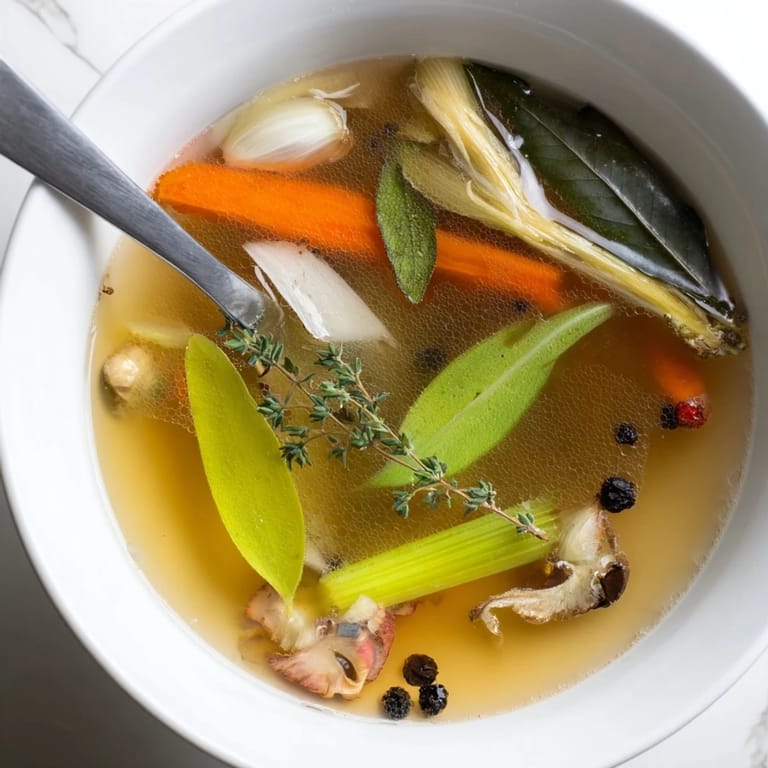
- Vegetable Scraps: 4 cups of assorted trimmings like carrot peels, onion skins, celery ends, leek tops, mushroom stems, parsley stems, and garlic skins
- Bay Leaf: 1 whole leaf adds subtle depth and earthiness
- Black Peppercorns: 5 to 7 whole peppercorns provide gentle warmth
- Garlic: 2 crushed cloves, optional but recommended
- Salt: 1 teaspoon, optional depending on intended use
- Thyme: 1 sprig fresh or half teaspoon dried for herbaceous notes
- Cold Water: 8 cups or 2 liters
Tired of Takeout? 🥡
Get 10 meals you can make faster than delivery arrives. Seriously.
One email. No spam. Unsubscribe anytime.
Instructions
- Gather Your Scraps:
- Collect clean, fresh vegetable trimmings in a large bowl, avoiding potato peels, brassicas, and overly starchy vegetables which can cause bitterness
- Combine Everything:
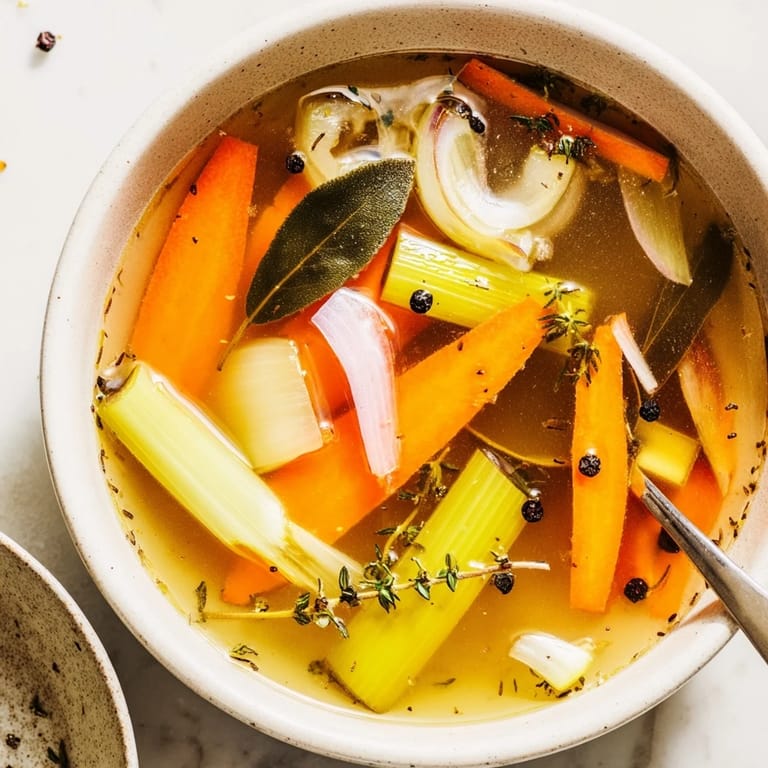
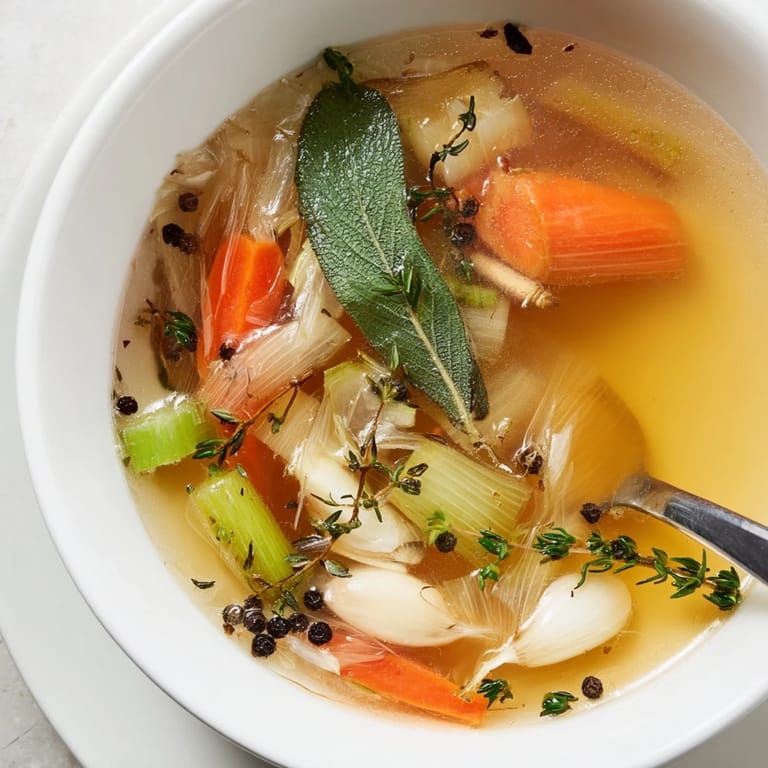
- Place the vegetable scraps, bay leaf, peppercorns, crushed garlic, salt, and thyme into a large stockpot
- Add Water:
- Pour in the cold water, making sure all vegetable pieces are fully submerged
- Bring to Boil:
- Heat the pot over medium high heat until it reaches a rolling boil
- Simmer Gently:
- Reduce heat to low and simmer uncovered for 45 to 60 minutes, skimming off any foam that rises to the surface
- Taste and Adjust:
- Sample the broth and add more salt if needed, keeping in mind how you plan to use it
- Strain Well:
- Pour the broth through a fine mesh sieve or cheesecloth into a clean container, discarding all the solids
- Store Properly:
- Let the broth cool completely before transferring to airtight containers
 Save
Save This simple practice has completely transformed how I view cooking. Every time I strain a batch of golden broth, I feel connected to generations of cooks who understood that nothing in the kitchen should go to waste. It is not just about saving money. It is about respecting the ingredients and coaxing every bit of flavor they have to offer.
Building Flavor
The secret to a really exceptional broth lies in the variety of scraps you collect. Onion skins add beautiful golden color, while mushroom stems contribute deep umami notes. I have learned that keeping a balanced mix of sweet vegetables like carrots with more pungent ones like garlic creates the most well rounded flavor profile.
Storage Solutions
I freeze my broth in various sized containers so I always have the right amount on hand. Ice cube trays work perfectly for small portions when you just need a splash for deglazing a pan. Larger containers hold the perfect amount for soup bases. Label everything with the date because frozen broth can look surprisingly similar after a few months.
Endless Possibilities
Beyond soups and stews, this broth has become my secret weapon in the kitchen. I use it to cook grains instead of plain water, adding layers of flavor to otherwise simple dishes. A splash in a pan sauce adds instant depth and richness. I have even been known to drink it straight from a mug on cold winter mornings.
- Try adding a piece of kombu seaweed for extra minerals
- Freeze scraps until you have enough for a full batch
- Never season heavily if planning to reduce the broth later
 Save
Save Once you start making your own vegetable broth, store bought versions will seem disappointingly flat. There is a quiet pride in knowing that nothing in your kitchen goes to waste. Happy cooking.
Recipe FAQs
- → What vegetables should I avoid adding to broth?
Skip potato peels, brassicas like broccoli and cauliflower, and strongly flavored vegetables such as beet greens or excessive amounts of bitter greens. These can make broth cloudy, overly starchy, or unpleasantly bitter.
- → Can I freeze vegetable scraps until I have enough to make broth?
Absolutely. Keep a resealable bag in your freezer and add trimmings as you cook. Once you've accumulated about 4 cups, you're ready to simmer a batch of flavorful broth.
- → How long does homemade vegetable broth last?
Refrigerated broth stays fresh for up to 5 days. For longer storage, freeze in airtight containers or ice cube trays for convenient portions. Frozen broth maintains quality for about 3 months.
- → What's the best way to strain broth for clarity?
Line a fine-mesh sieve with cheesecloth for the clearest results. Let the broth drain naturally without pressing on the solids—pressing can extract sediment and create cloudiness in your finished base.
- → Should I salt my homemade broth?
Keep salt minimal or omit it entirely. Since you'll likely use this broth in soups, stews, or grain dishes where you'll season the final dish, starting with an unsalted or lightly salted base gives you more control over sodium levels.
- → How can I make my vegetable broth more flavorful?
Roast scraps at 200°C for 20 minutes before simmering to develop deep, caramelized notes. Add dried mushrooms or a piece of kombu seaweed for umami richness, or include fresh herbs like parsley and thyme during the last 15 minutes of cooking.