 Save
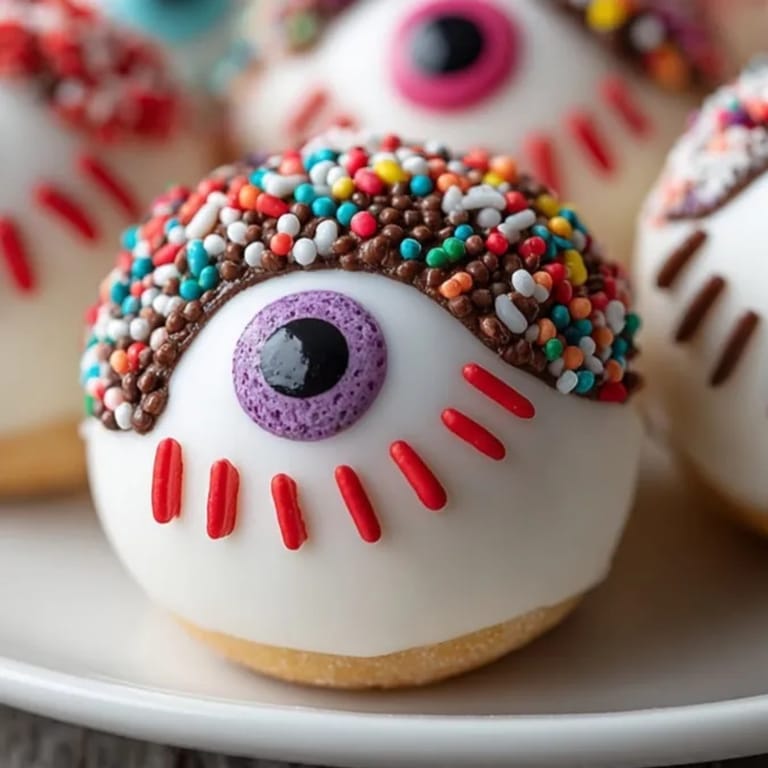
Save Monster Donut Hole Eyeballs are my answer to quick party treats that look impressive and deliver on taste. These bite-sized delights turn classic donut holes into spooky monster eyes that steal the show on any dessert table. They are ideal for Halloween or any fun gathering where playful, themed snacks are a must.
I always make these with my kids before Halloween night. We laugh at our uneven pupils and wild icing patterns and they quickly disappear at our parties with lots of playful screams.
Ingredients
- Donut holes: fresh or store-bought plain donut holes work best for a neutral base
- White candy melts or white chocolate chips: create a smooth eye background check ingredients for best quality white chocolate
- Candy-coated chocolate candies: MMs or similar in various colors for bright irises choose crisp shells and bold colors
- Mini chocolate chips: complete the spooky look with realistic pupils use fresh chips for shine
- Red gel icing: brings the monster veins to life pick a trusted gel brand for vivid hue and easy piping
- Coconut oil (optional): thins chocolate and ensures easy dipping use refined for a neutral flavor
- Sprinkles or colored sugars (optional): amp up the monster magic with creative textures
Tired of Takeout? 🥡
Get 10 meals you can make faster than delivery arrives. Seriously.
One email. No spam. Unsubscribe anytime.
Instructions
- Prep Your Workspace:
- Line your baking sheet with parchment paper to keep the donut holes from sticking and to make cleanup easy
- Melt the Coating:
- Place white candy melts or chocolate chips in a microwave-safe bowl. Heat in thirty second intervals stirring well after each until perfectly smooth. If the mixture is too thick add coconut oil for a silky texture
- Dip the Donut Holes:
- Gently roll each donut hole in the melted coating using a fork or dipping tool. Coat the entire surface for an even white layer. Place them carefully on your lined sheet
- Add the Iris:
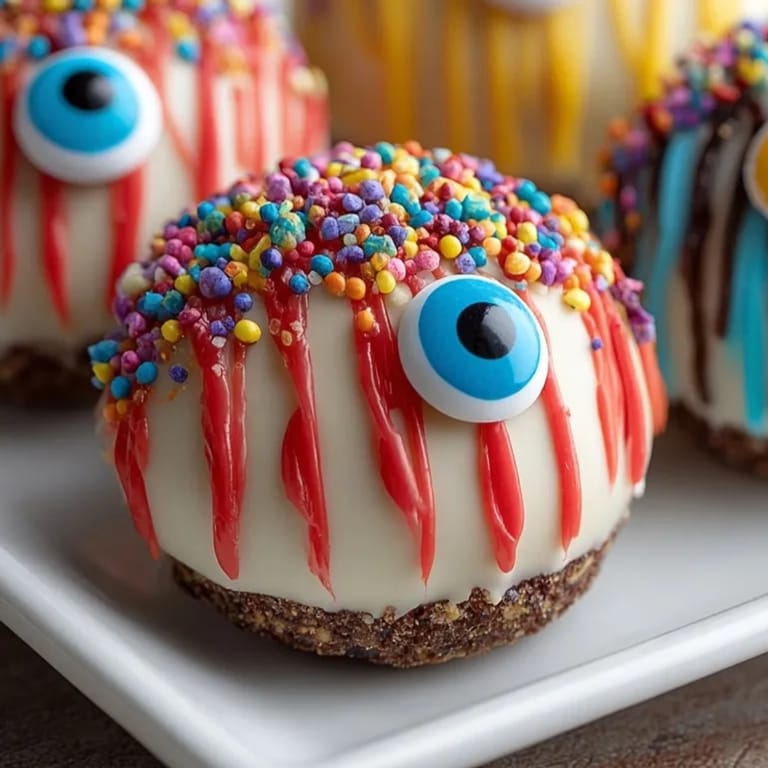
- While the coating is wet press one candy-coated chocolate into the center of each donut hole. Choose bold colors to make each monster unique
- Build the Pupils:
- Immediately place a mini chocolate chip in the middle of the candy iris. This forms the eye detail and stays in place as the coating sets
- Set and Chill:
- Let the decorated donut holes stand at room temperature or refrigerate for ten minutes. This helps firm up the white coating for easy handling
- Pipe the Veins:
- Using a piping bag draw squiggly lines with red gel icing from the iris outward. The thin lines mimic creepy blood vessels for a realistic monster effect
- Monster Decorations:
- If you want more drama add sprinkles or colored sugars before the coating dries. Get creative with patterns and monster faces
- Serve and Wow:
- Transfer finished eyeballs onto a spooky platter. They are ready to enjoy and show off at your next Halloween bash
 Save
Save My favorite part is choosing wild iris colors. Last year my nephew made a neon blue eyed monster with flaming candy horns everyone loved it and we took plenty of silly photos before devouring them.
Storage Tips
These treats are best enjoyed fresh for a soft donut interior and bright decorations. If making ahead store them in an airtight container at room temperature for up to two days. Refrigeration keeps the coating stable but may slightly change the donut texture.
Ingredient Substitutions
If you want to avoid white chocolate try colored candy melts for themed monster eyes. Dairy free chocolate chips and gluten free donut holes make this recipe easier for dietary restrictions. Use store-bought gel icing for better stability than homemade versions.
Serving Suggestions
Arrange the monster eyeballs in concentric circles on a black platter for the ultimate spooky reveal. Add fake spiders or gummy worms for more themed drama. These also make adorable cupcake toppers for a Halloween dessert spread.
Cultural and Historical Context
Donuts have long been part of American party traditions. Decorating these mini versions for Halloween combines playful food art with classic snack appeal. Eyeball treats tap into the fun and frightful spirit of haunted celebrations giving everyone a reason to join in.
Seasonal Adaptations
Use minty green or icy blue candy melts for winter monsters at holiday parties. Try orange and purple irises for autumn and harvest themes. Go pastel for springtime monster tea parties to delight younger kids.
Three Helpful Notes
You can buy pre-made donut holes for a faster process. Let kids decorate their own for maximum fun and creativity. Donut holes with a cake texture hold up better than yeast versions for dipping.
Success Stories
After our first batch disappeared at a school Halloween party my kids asked for a monster donut decorating contest the following week. Neighbors quickly joined in and our table of wild donuts became the talk of the block. It is amazing how quick treats like these make the best memories.
Freezer Meal Conversion
I do not recommend freezing completed monster eyeballs since the decorations can run and the donuts lose their softness. If you must prep ahead freeze undecorated plain donut holes and decorate fresh on serving day.
 Save
Save Monster Donut Hole Eyeballs always deliver a wow moment at any party and never fail to spark a smile. I hope your table is full of wild colorful monsters and laughter just like ours every Halloween.
Recipe FAQs
- → How do you get the coating smooth on donut holes?
Melt white candy melts or white chocolate chips in intervals, stirring frequently, and add coconut oil for a silkier texture.
- → Can I use homemade donut holes?
Yes, both homemade and store-bought donut holes work well for these monster eyeballs.
- → What candies work best for the iris?
Candy-coated chocolates like M&M’s are great for the iris, but other similar-sized candies also fit the theme.
- → How long do monster donut hole eyeballs stay fresh?
Best enjoyed the day made, they keep fresh in an airtight container for up to two days.
- → Is there a vegetarian option for decorations?
The listed ingredients are vegetarian; always check specific candy labels for added animal products.
- → How can I personalize the monster eyeballs?
Use colored candy melts, sprinkles, edible candy eyes, or various gel icing colors for unique monster effects.