Save
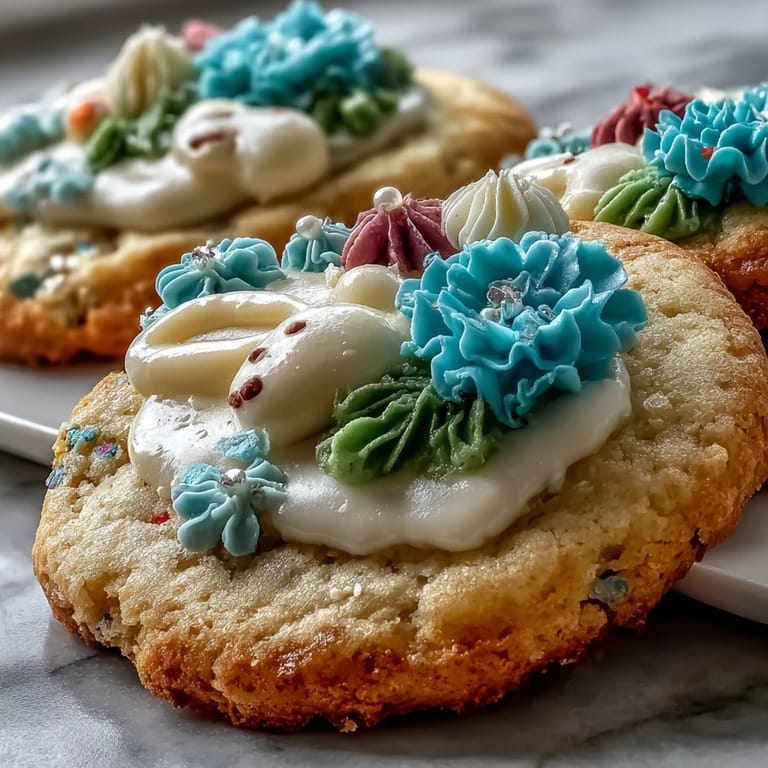
Save My sister called me in a panic three days before Easter, asking if I could bring something homemade to her brunch. Standing in my kitchen at dusk, I remembered how my grandmother used to pipe delicate icing designs onto sugar cookies every spring, and how the whole house would smell like vanilla and butter for days. That evening, I decided these pastel Easter cookies would be my answer, and they've become the one thing everyone asks me to bring back year after year.
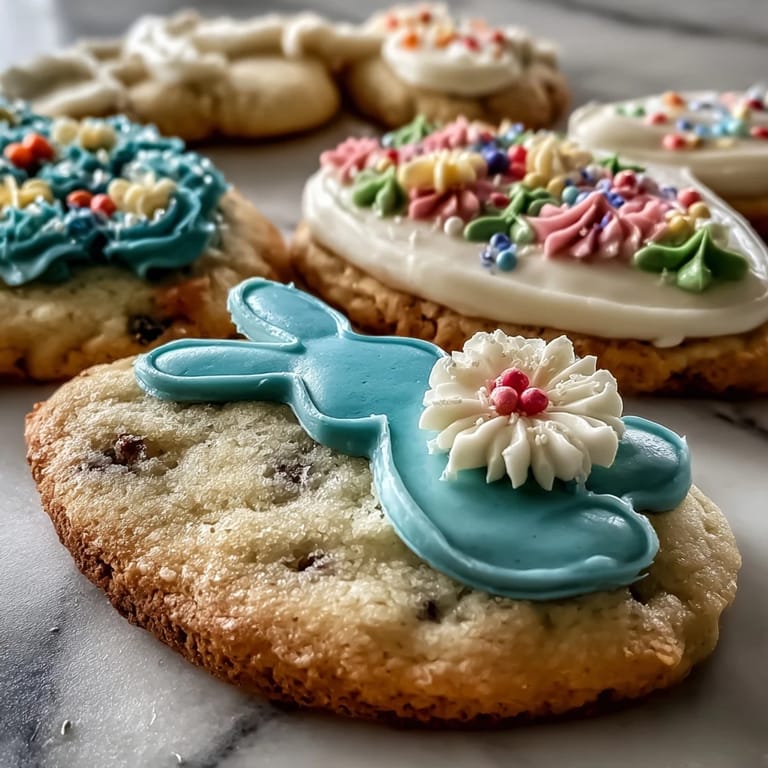
I'll never forget watching my five-year-old nephew carefully pipe pastel yellow icing onto a bunny-shaped cookie last spring, his tongue poking out in concentration while his sister narrated his every move. He asked if the cookies could taste like the colors looked, and I realized right then that these aren't just treats—they're the edible version of anticipation and joy mixed together.
Ingredients
- All-purpose flour: The foundation of tender cookies, and measuring by weight rather than cups will change your baking life if you haven't already discovered that trick.
- Unsalted butter: Room temperature is non-negotiable here because cold butter won't cream properly and you'll end up with dense, sad cookies instead of light, delicate ones.
- Granulated sugar: The creaming process with butter is what gives these cookies their signature tender crumb, so don't skip the beating step even though your arm might protest.
- Egg and vanilla extract: These bind everything together while adding moisture that keeps the cookies soft rather than crispy, which is exactly what you want.
- Meringue powder: This ingredient is the secret to royal icing that cooperates—it stabilizes the egg whites so your icing holds its shape without cracking as it dries.
- Gel food coloring in pastels: Gel colors are gentler on your icing consistency than liquid food coloring, which can make your carefully beaten icing suddenly runny and disappointing.
Tired of Takeout? 🥡
Get 10 meals you can make faster than delivery arrives. Seriously.
One email. No spam. Unsubscribe anytime.
Instructions
- Make the dough foundation:
- Whisk together your flour, baking powder, and salt in a medium bowl so everything is evenly distributed before it meets the butter and sugar. This step might feel like an extra step, but it prevents little pockets of dry flour from hiding in your cookies.
- Cream your butter and sugar:
- Beat them together for 2–3 minutes until the mixture looks pale and fluffy, almost like mousse, because this is where you're building air into the dough that will make your cookies tender. You'll know it's ready when you lift the beaters and the mixture falls in soft peaks instead of clumps.
- Add the egg and vanilla:
- Mix these in thoroughly so they're completely incorporated, then take a moment to appreciate how smooth and creamy everything looks at this point. This is the moment when you can smell the vanilla starting to wake up, which never gets old.
- Bring the dough together gently:
- Add your dry ingredients gradually on low speed, then add the milk and mix just until everything comes together without any streaks of flour visible. This is where patience matters because overmixing develops gluten and turns your tender cookies into tough ones.
- Chill and rest:
- Divide the dough in half, flatten each into a disc, wrap tightly in plastic, and refrigerate for at least an hour because cold dough is cooperative dough. You can even do this overnight, which means you're basically doing your future self a huge favor.
- Preheat and prepare:
- Get your oven to 350°F and line your baking sheets with parchment paper so your cookies don't stick and everything bakes evenly from underneath. This small preparation step prevents frustration when you're trying to move warm cookies.
- Roll and cut:
- On a lightly floured surface, roll one disc of dough to 1/4-inch thickness and cut your Easter shapes, making sure to work the dough as little as possible to keep everything tender. If the dough gets too warm and sticky, just pop it back in the fridge for 10 minutes and it'll cooperate again.
- Space and bake:
- Place cookies on your prepared sheets about an inch apart and bake for 8–10 minutes until the edges are just turning golden but the centers still look slightly underdone. The cookies will continue cooking on the hot sheet for a few minutes after you remove them, and this is the secret to keeping them soft.
- Cool with intention:
- Leave them on the baking sheet for 5 minutes so they firm up enough to move without falling apart, then transfer to wire racks to cool completely before decorating. Patience here prevents crushed cookies and broken dreams.
- Make your royal icing magic:
- Combine your powdered sugar and meringue powder, then add water gradually while beating on low until smooth, then switch to high speed for 3–4 minutes until you have stiff peaks that stand up proudly. You'll know it's ready when a peak holds its shape without drooping, and the whole thing looks like fluffy, edible clouds.
- Divide and tint:
- Split your icing among bowls and add just a tiny amount of pastel gel color to each one because these colors go from pretty to garish very quickly. A toothpick dab is genuinely enough to start with.
- Decorate with joy:
- Transfer your colored icing to piping bags and let your creativity take over, knowing that imperfect lines and wobbly designs are exactly what makes homemade cookies charming. Let the icing set completely, which takes a few hours but is worth the wait because you want that beautiful matte finish.
 Save
Save There's something almost magical about handing someone a box of these cookies and watching their face light up at the colors, knowing that inside is something tender and buttery and completely homemade. That moment, more than anything else, is why I make these every spring.
The Art of Cookie Decorating
Decorating these cookies is where precision meets permission to be imperfect, and honestly, that's where the fun lives. You can pipe clean lines if that makes you happy, or you can flood the entire cookie with icing and sprinkle edible glitter like you're five years old again, and both approaches are equally valid. The royal icing will dry hard enough that you can stack these cookies in boxes without smudging, which is a practical win that also feels like magic.
Flavor Variations Worth Trying
Once you've made these once and they're perfect, you might feel brave enough to experiment with the flavoring. A teaspoon of almond extract in place of some vanilla brings this sophisticated nuttiness that pairs beautifully with pastel icing, or you could add lemon zest and use lemon extract for something bright and springy. Even adding a quarter teaspoon of cardamom creates something subtle and surprising that makes people ask what that special something is.
Storage and Sharing Wisdom
These cookies will keep in an airtight container for up to a week, which means you can make them ahead and actually enjoy your Easter gathering instead of being covered in flour and icing. The royal icing hardens completely, so they travel beautifully and taste just as good on the third day as they did fresh, which is rare and wonderful. Honestly, they also make incredible gifts because they look like you spent hours on them, which you did, but it feels like a secret when someone bites into that tender dough.
- If you're making these days in advance, decorate them a day or two before serving so the icing has time to fully set and look its polished best.
- Stack them with parchment paper between layers to prevent any sticking, and they'll survive being transported in a box without becoming a disaster.
- These pair beautifully with Earl Grey tea or a simple glass of milk, making them perfect for morning brunches or afternoon celebrations.
 Save
Save These cookies exist in that perfect space between impressive enough to feel special and simple enough to actually pull off in your kitchen. Every time you make them, you're creating something that tastes like spring and celebration tastes like care.
Recipe FAQs
- → How can I keep sugar cookies soft?
To maintain softness, avoid overbaking cookies and ensure they are stored in an airtight container.
- → What is the best way to get smooth pastel icing?
Mix powdered sugar and meringue powder with warm water until smooth, then divide and tint each portion with gel food coloring for vibrant pastel shades.
- → Can I add other flavors to the dough or icing?
Yes, lemon or almond extracts can be added to enhance the flavor of either the dough or the icing.
- → How thick should I roll the dough before cutting shapes?
Roll the dough to about 1/4-inch (6 mm) thickness for the best texture and baking results.
- → What tools do I need for decorating these cookies?
Use piping bags or squeeze bottles along with Easter-shaped cutters and parchment-lined baking sheets for easy decorating and baking.