 Save
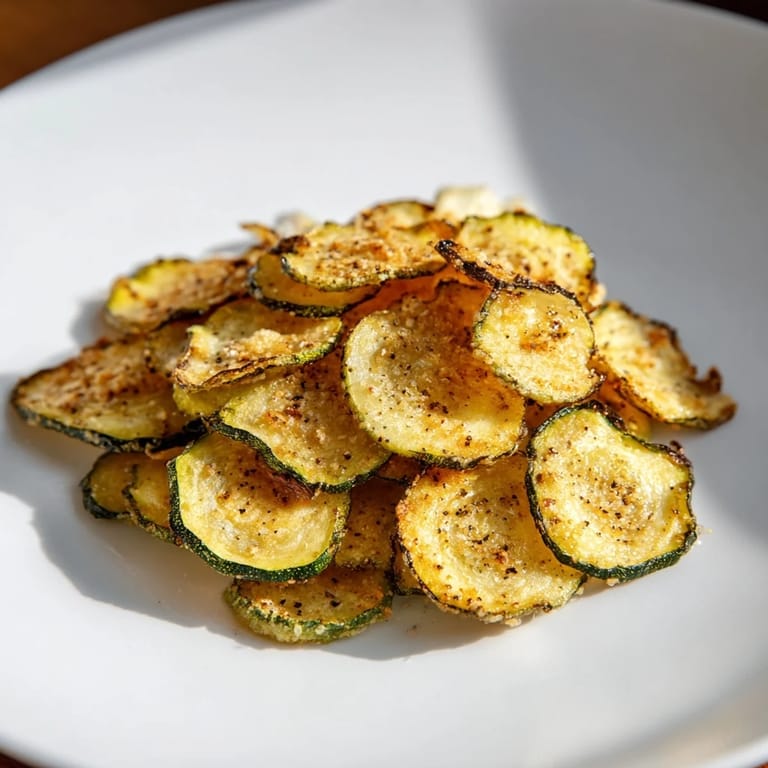
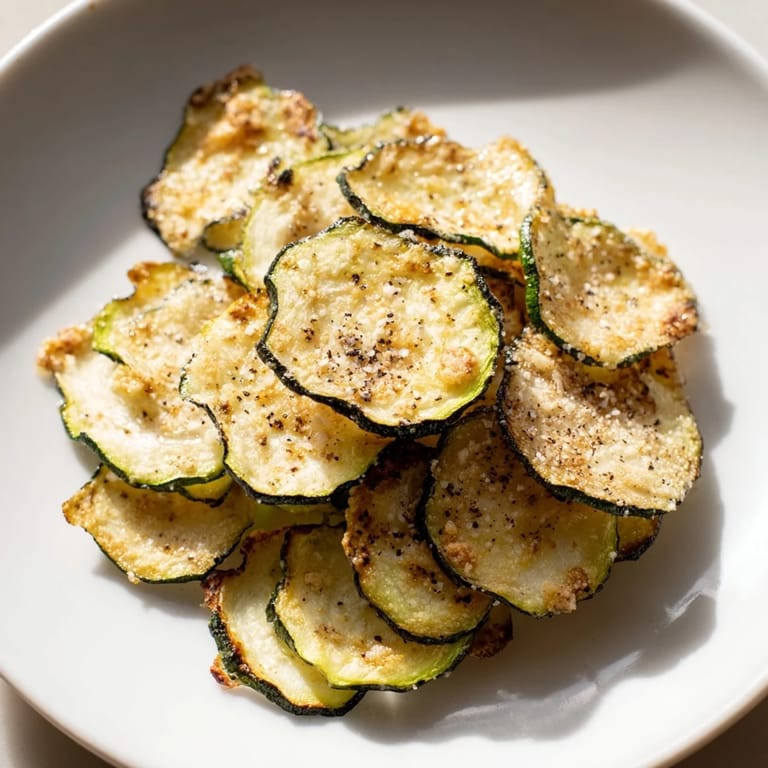
Save My sister texted me a photo of her kids refusing store-bought snacks at lunch, so I got to thinking about what would actually make them excited to eat something green. That's when I remembered a bag of crispy zucchini chips from a farmer's market booth—they were so shamelessly crunchy that I decided to figure out how to make them at home. Turns out, the secret isn't complicated; it's all about patience and a low oven. Now whenever I make a batch, they disappear faster than anything else in my kitchen.
I made these for a lazy Sunday movie night with my partner, and he kept reaching for another handful without even looking away from the screen—that's when I knew I'd nailed it. There's something satisfying about serving food you made yourself, especially when it's something so simple yet so crave-worthy.
Ingredients
- 2 medium zucchinis: Look for ones that are firm and not too watery—smaller zucchinis tend to have fewer seeds and less moisture, which is your friend here.
- 1 tablespoon olive oil: This is what gets them golden and helps the seasoning stick, so don't skip it or go lighter thinking you're being healthy.
- 1/2 teaspoon sea salt: Fine sea salt dissolves evenly; coarse salt can leave bitter pockets.
- 1/4 teaspoon freshly ground black pepper: Fresh is the only way—pre-ground loses its bite over time.
- 1/2 teaspoon garlic powder (optional): Adds depth without moisture, which is what you want when chasing crispiness.
- 1/2 teaspoon smoked paprika (optional): I use this almost always because it gives a subtle complexity that makes people ask what the secret ingredient is.
Tired of Takeout? 🥡
Get 10 meals you can make faster than delivery arrives. Seriously.
One email. No spam. Unsubscribe anytime.
Instructions
- Get Your Setup Ready:
- Preheat your oven to 225°F and line two baking sheets with parchment paper—this low temperature is the difference between chips and shrunken sad chips, so resist the urge to go hotter.
- Slice Thin and Even:
- Wash and completely dry your zucchinis, then slice them into rounds about 1/8 inch thick using a mandoline if you have one, or your sharpest knife if you don't. Uneven slices will cook unevenly, so take your time here.
- Dry Them Out:
- Pat those slices aggressively with paper towels—you're trying to remove as much moisture as possible because water is the enemy of crispy. Don't be shy about it.
- Season and Coat:
- Toss everything in a bowl with the olive oil and seasonings until each slice is lightly covered. You want a whisper of oil, not a puddle.
- Spread Them Out:
- Arrange the slices in a single layer on your baking sheets without overlapping—if they touch, they'll steam instead of crisp. Think of them as needing personal space.
- The Long Bake:
- Bake for the first hour, then rotate your sheets and flip each chip. This ensures even cooking and prevents the bottoms from browning too much before the tops dry out.
- Finish Strong:
- Continue baking for another 30 to 40 minutes, watching them toward the end until they're golden and completely crisp. You'll know they're done when they feel papery-thin and snap slightly.
- Cool and Crisp:
- Let them cool completely on the baking sheets—this is where they actually finish crisping up as the residual heat does its thing. Patience here pays off.
 Save
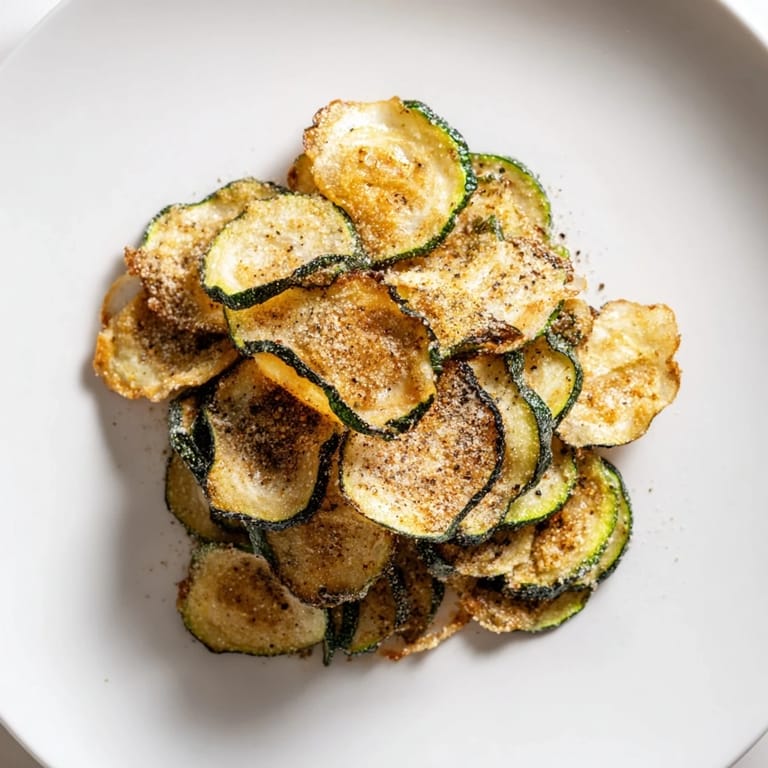
Save My mom tried these and actually said they were better than the store version, which felt like winning some kind of kitchen award. It's those small moments that make cooking feel less like a chore and more like creating something people genuinely want to eat again.
Flavor Variations That Work
Once you've mastered the basic version, the fun starts. I've done everything from Italian herbs with a pinch of nutritional yeast to a hit of chili powder and lime zest for something with a little attitude. The beauty is that the foundation is so solid—the low-and-slow method—that almost any seasoning combination works as long as you're not adding wet ingredients that would introduce moisture.
Storage and Keeping Them Crispy
These are genuinely best eaten the same day because they absorb moisture from the air over time, and nobody wants sad, limp chips. I learned this the hard way when I made a batch for the next day and was disappointed—now I just make them when I want to eat them. If you somehow have leftovers, an airtight container keeps them decent for a day, and you can briefly crisp them back up in a low oven if needed.
Why This Became My Go-To Snack
There's real power in having a snack that tastes indulgent but actually feels good to eat. These chips sit on that beautiful line between satisfying a craving for something crunchy and salty while also being something you don't feel guilty about reaching for again and again. It's the kind of thing that makes you feel a little bit clever in your kitchen, which honestly is half the fun of cooking.
- If you're nervous about the timing, start checking around the 1 hour 15 minute mark to get a feel for how they're progressing in your oven.
- A mandoline makes this recipe ridiculously easy, but if you don't have one, a sharp chef's knife and a steady hand work just fine.
- Parmesan cheese sprinkled on before baking is genuinely incredible if you want something a bit more decadent.
 Save
Save These zucchini chips have become the snack I actually crave, which feels like a small victory in a world of convenience foods. Make them once and you'll understand why.
Recipe FAQs
- → How do you achieve crispy zucchini chips?
Slicing the zucchini thinly and drying them thoroughly before baking at a low temperature for an extended period helps remove moisture, resulting in crispiness.
- → Can I add different seasonings to the chips?
Yes, spices like smoked paprika, garlic powder, chili powder, or Italian herbs can be used to vary the flavor.
- → What is the best way to slice zucchini evenly?
Using a mandoline or a sharp knife to slice about 1/8 inch thick ensures uniform cooking and crisp texture.
- → How should these chips be stored?
Keep them in an airtight container at room temperature and consume within two days to maintain crunchiness.
- → Can these chips be made dairy-free?
Yes, simply omit any cheese toppings and stick to the basic seasoning for a dairy-free version.