 Save
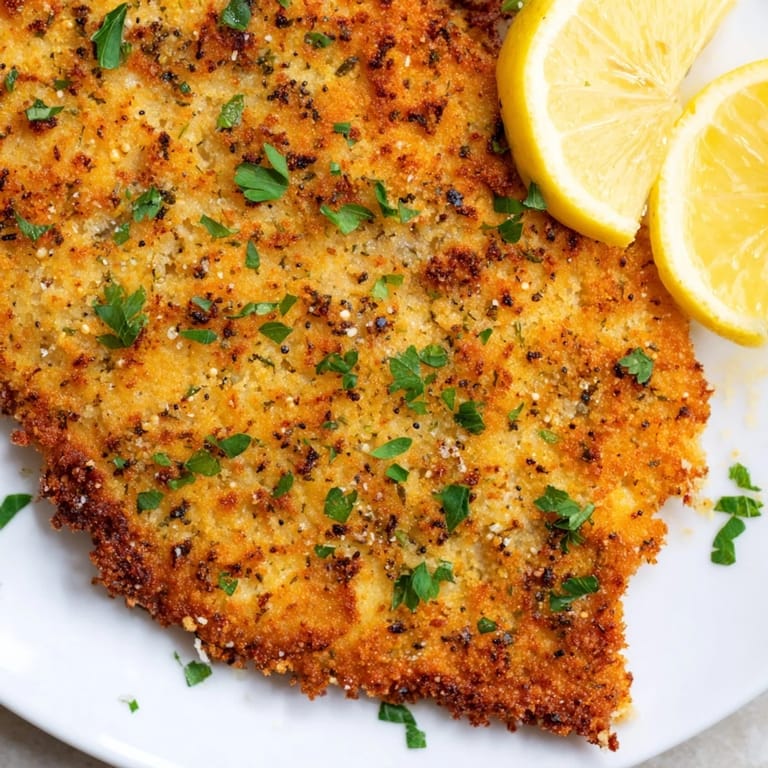
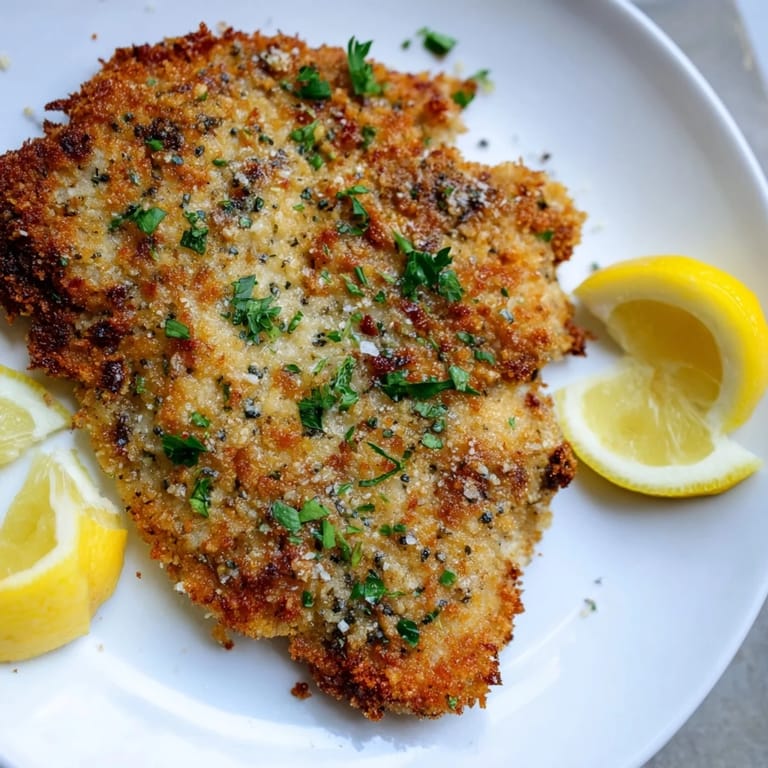
Save My mom used to make these cutlets on nights when we needed something quick but felt special, and I'd watch from the kitchen counter as she'd pound the chicken with this rhythmic thwack that somehow made everything taste better before we even ate. Years later, I recreated that same magic in my own kitchen, and now it's become my go-to when friends drop by unexpectedly or when I want to feel accomplished on a Tuesday. There's something about that golden-brown crust that catches the light just right, and the way it shatters under your fork—it's restaurant-quality simplicity.
I made this for my sister's surprise dinner party last spring, and watching her face light up when she took that first bite reminded me that the simplest dishes often hit hardest. She kept asking what fancy restaurant technique I'd learned, and I couldn't stop laughing because really, it's just chicken, eggs, and bread doing exactly what they're supposed to do.
Ingredients
- Boneless, skinless chicken breasts (4 pieces, about 150g each): Look for breasts that are roughly the same thickness so they cook evenly; if some are noticeably thicker, pound them a bit extra.
- Large eggs (2) and milk (2 tablespoons): The milk thins the egg wash slightly, helping it cling better and creating a lighter, more delicate coating.
- Grated Parmesan cheese (1 cup, 100g): Freshly grated tastes sharper and adheres better than pre-shredded; it's worth the 30 seconds with a box grater.
- Panko breadcrumbs (1 cup, 100g): These coarser crumbs fry up crispier than regular breadcrumbs and give you that restaurant texture.
- All-purpose flour (1/2 cup, 60g): This base layer helps the egg mixture grip the chicken and keeps the coating from sliding off during frying.
- Garlic powder (1 teaspoon) and dried oregano (1 teaspoon): These two seasonings are the backbone of that Italian-American flavor without overpowering the chicken.
- Salt and black pepper (1/2 teaspoon each, plus extra for seasoning): Season the chicken itself before breading so the flavor goes all the way through, not just on the surface.
- Olive oil (1/3 cup, 80ml): Use regular olive oil here, not extra virgin, since you're heating it to frying temperature; extra virgin will smoke and taste bitter.
- Lemon wedges and fresh parsley (optional garnish): The acid from lemon cuts through the richness perfectly, and parsley adds a fresh brightness that makes the whole plate pop.
Tired of Takeout? 🥡
Get 10 meals you can make faster than delivery arrives. Seriously.
One email. No spam. Unsubscribe anytime.
Instructions
- Pound the chicken to even thickness:
- Place each breast between two sheets of plastic wrap and use a meat mallet or rolling pin to gently but firmly pound until about 1/2 inch thick. This ensures everything cooks at the same rate and keeps the meat tender.
- Season the chicken:
- Sprinkle both sides lightly with salt and pepper; this step is crucial because it seasons the meat itself, not just the crust.
- Set up your breading station:
- Arrange three shallow bowls in a line: one with flour, one with eggs whisked together with milk, and one with panko, Parmesan, garlic powder, and oregano mixed thoroughly.
- Bread each cutlet:
- Coat the chicken in flour first, shaking off excess, then dip into the egg mixture, then press firmly into the breadcrumb mixture so it adheres evenly. The pressing step makes all the difference.
- Heat your oil:
- Pour oil into a large skillet and heat over medium-high heat until it shimmers and a small piece of bread dropped in sizzles immediately. This usually takes about 2 minutes.
- Fry the chicken:
- Working in batches so you don't crowd the pan, cook each cutlet for 3 to 4 minutes per side until the crust turns deep golden brown and the internal temperature reaches 74°C (165°F). You'll hear a gentle sizzle that tells you the crust is forming.
- Drain and rest:
- Transfer cooked cutlets to a paper towel-lined plate; the residual heat finishes cooking the interior while the towels absorb excess oil.
- Finish and serve:
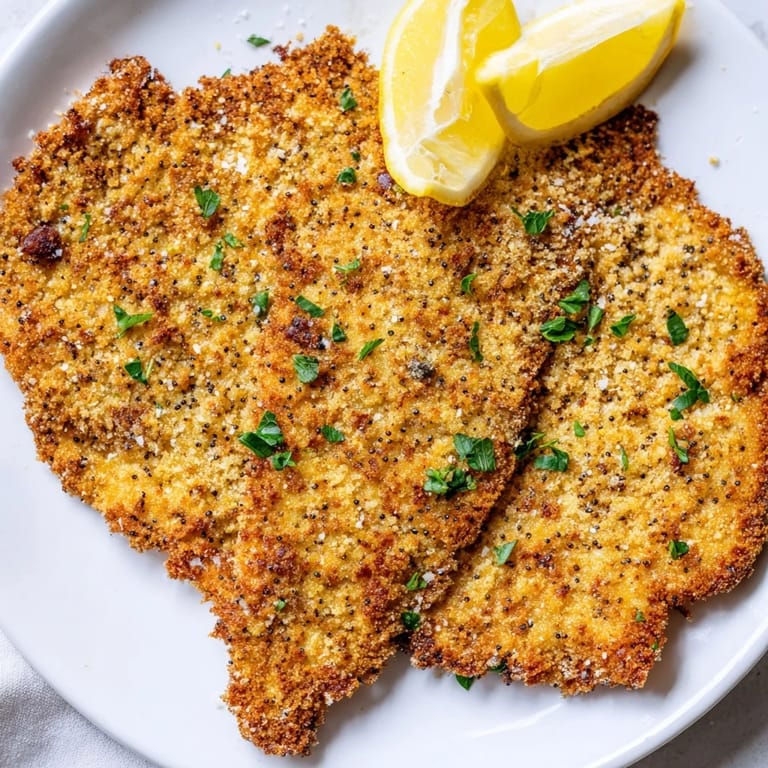
- Arrange on a plate, garnish with fresh parsley and lemon wedges, and serve while the crust is still crackling.
 Save
Save There's a moment right when the chicken hits the hot oil and the kitchen fills with that toasty, savory smell that makes you realize you're about to create something really good. It's the sound that gets me every time—that satisfying sizzle that means everything is going exactly right.
Variations to Explore
Once you master the basic technique, this dish becomes a canvas for creativity. I've added everything from a pinch of chili flakes for heat to a sprinkle of lemon zest in the breadcrumb mixture for brightness, and each version tastes just as satisfying as the last. You can also swap the Parmesan for a mix of Parmesan and Romano for extra tang, or use panko mixed with finely grated Asiago for deeper flavor.
Serving Suggestions That Work
The beauty of this cutlet is how it plays well with almost any side, from a simple arugula salad with a squeeze of lemon to creamy pasta or roasted vegetables. I often serve it with a bright tomato sauce for dipping, or alongside crispy potatoes and a squeeze of fresh lemon—the acidity cuts right through the richness and makes each bite taste fresh. Some nights I'll shred the leftover cutlet and toss it into a sandwich with fresh mozzarella and greens.
Storage and Make-Ahead Tips
These cutlets hold up beautifully in the refrigerator for up to three days, and I've found that reheating them in a 375°F oven for about 8 minutes brings the crispiness right back. You can also bread them several hours ahead and refrigerate before frying, which actually helps the coating set better. Leftovers make incredible cold sandwiches the next day, or you can crumble them into salads or pasta dishes.
- Freeze uncooked breaded cutlets on a tray for 2 hours, then transfer to a freezer bag and cook straight from frozen, adding just a minute extra per side.
- Make extra and save some for quick lunches or emergency dinners when you need something good in 15 minutes.
- The key to crispy leftovers is drying them on paper towels immediately after cooking so condensation doesn't make them soggy.
 Save
Save This is the kind of dish that reminds you why cooking at home matters—it's fast, it's delicious, and it brings genuine pleasure to the table. Make it tonight, and you'll understand why it's been a favorite in kitchens for generations.
Recipe FAQs
- → How do I achieve extra crispy chicken cutlets?
Using panko breadcrumbs instead of regular ones enhances crispiness. Make sure to press the coating firmly and fry in hot oil without overcrowding the pan.
- → Can I prepare the cutlets ahead of time?
Yes, you can bread the chicken in advance and refrigerate before frying. Reheat leftovers in the oven to maintain crispiness.
- → What oil is best for frying the cutlets?
Olive oil or vegetable oil works well. Choose oils with a medium-high smoke point to ensure even cooking and a golden crust.
- → How thin should the chicken breasts be pounded?
Thin the breasts to about half an inch (1.25 cm) for even cooking and a tender texture.
- → What side dishes pair well with these chicken cutlets?
Fresh salads, pasta, roasted vegetables, or lemon wedges complement the cutlets beautifully, adding brightness and balance.